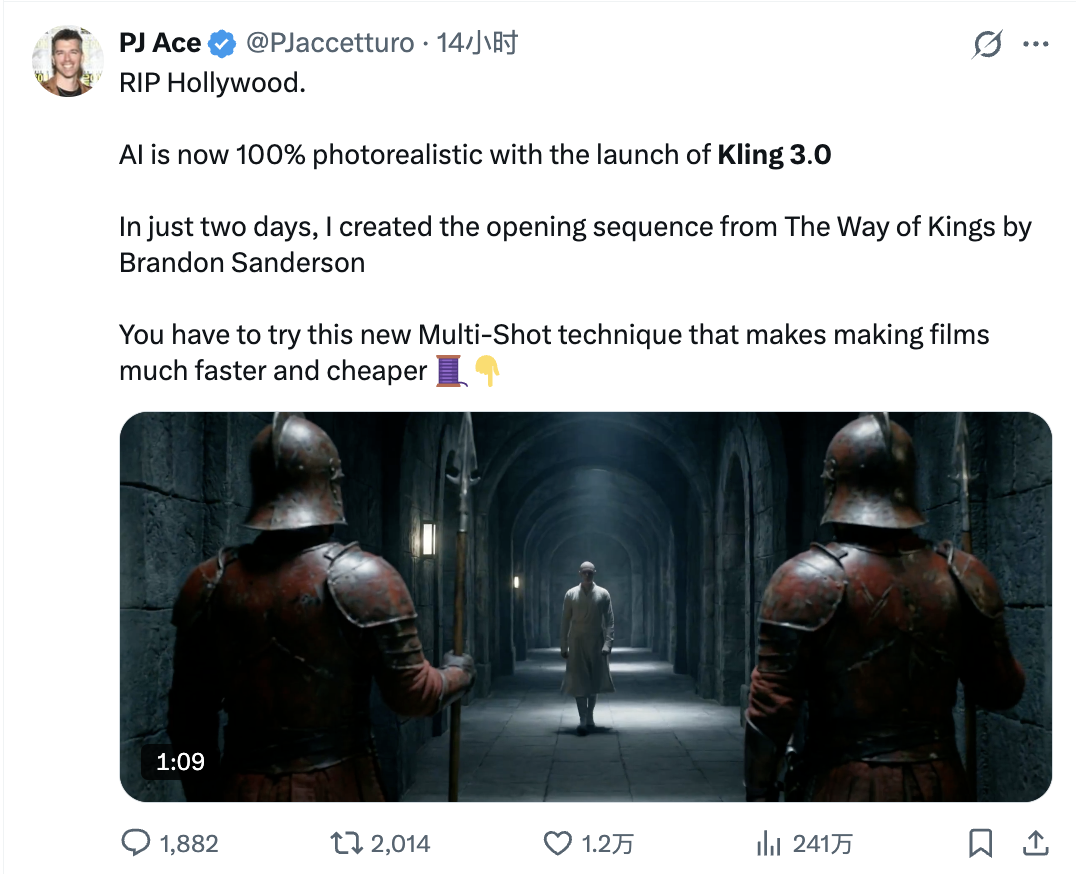
If you've spent time with Kling AI and found yourself asking "why does everyone else's output look so much better?" — the answer is almost never a hidden setting. It's a set of beginner mistakes that compound: vague prompts layered on top of noisy reference images layered on top of overly long clips. The model doesn't fail randomly; it fails predictably.
This guide breaks down the 6 most common mistakes developers and creators make with Kling, then gives you a reproducible optimization workflow and copy-paste prompt templates to replace guesswork with a system.
The 6 Mistakes That Tank Your Output Quality

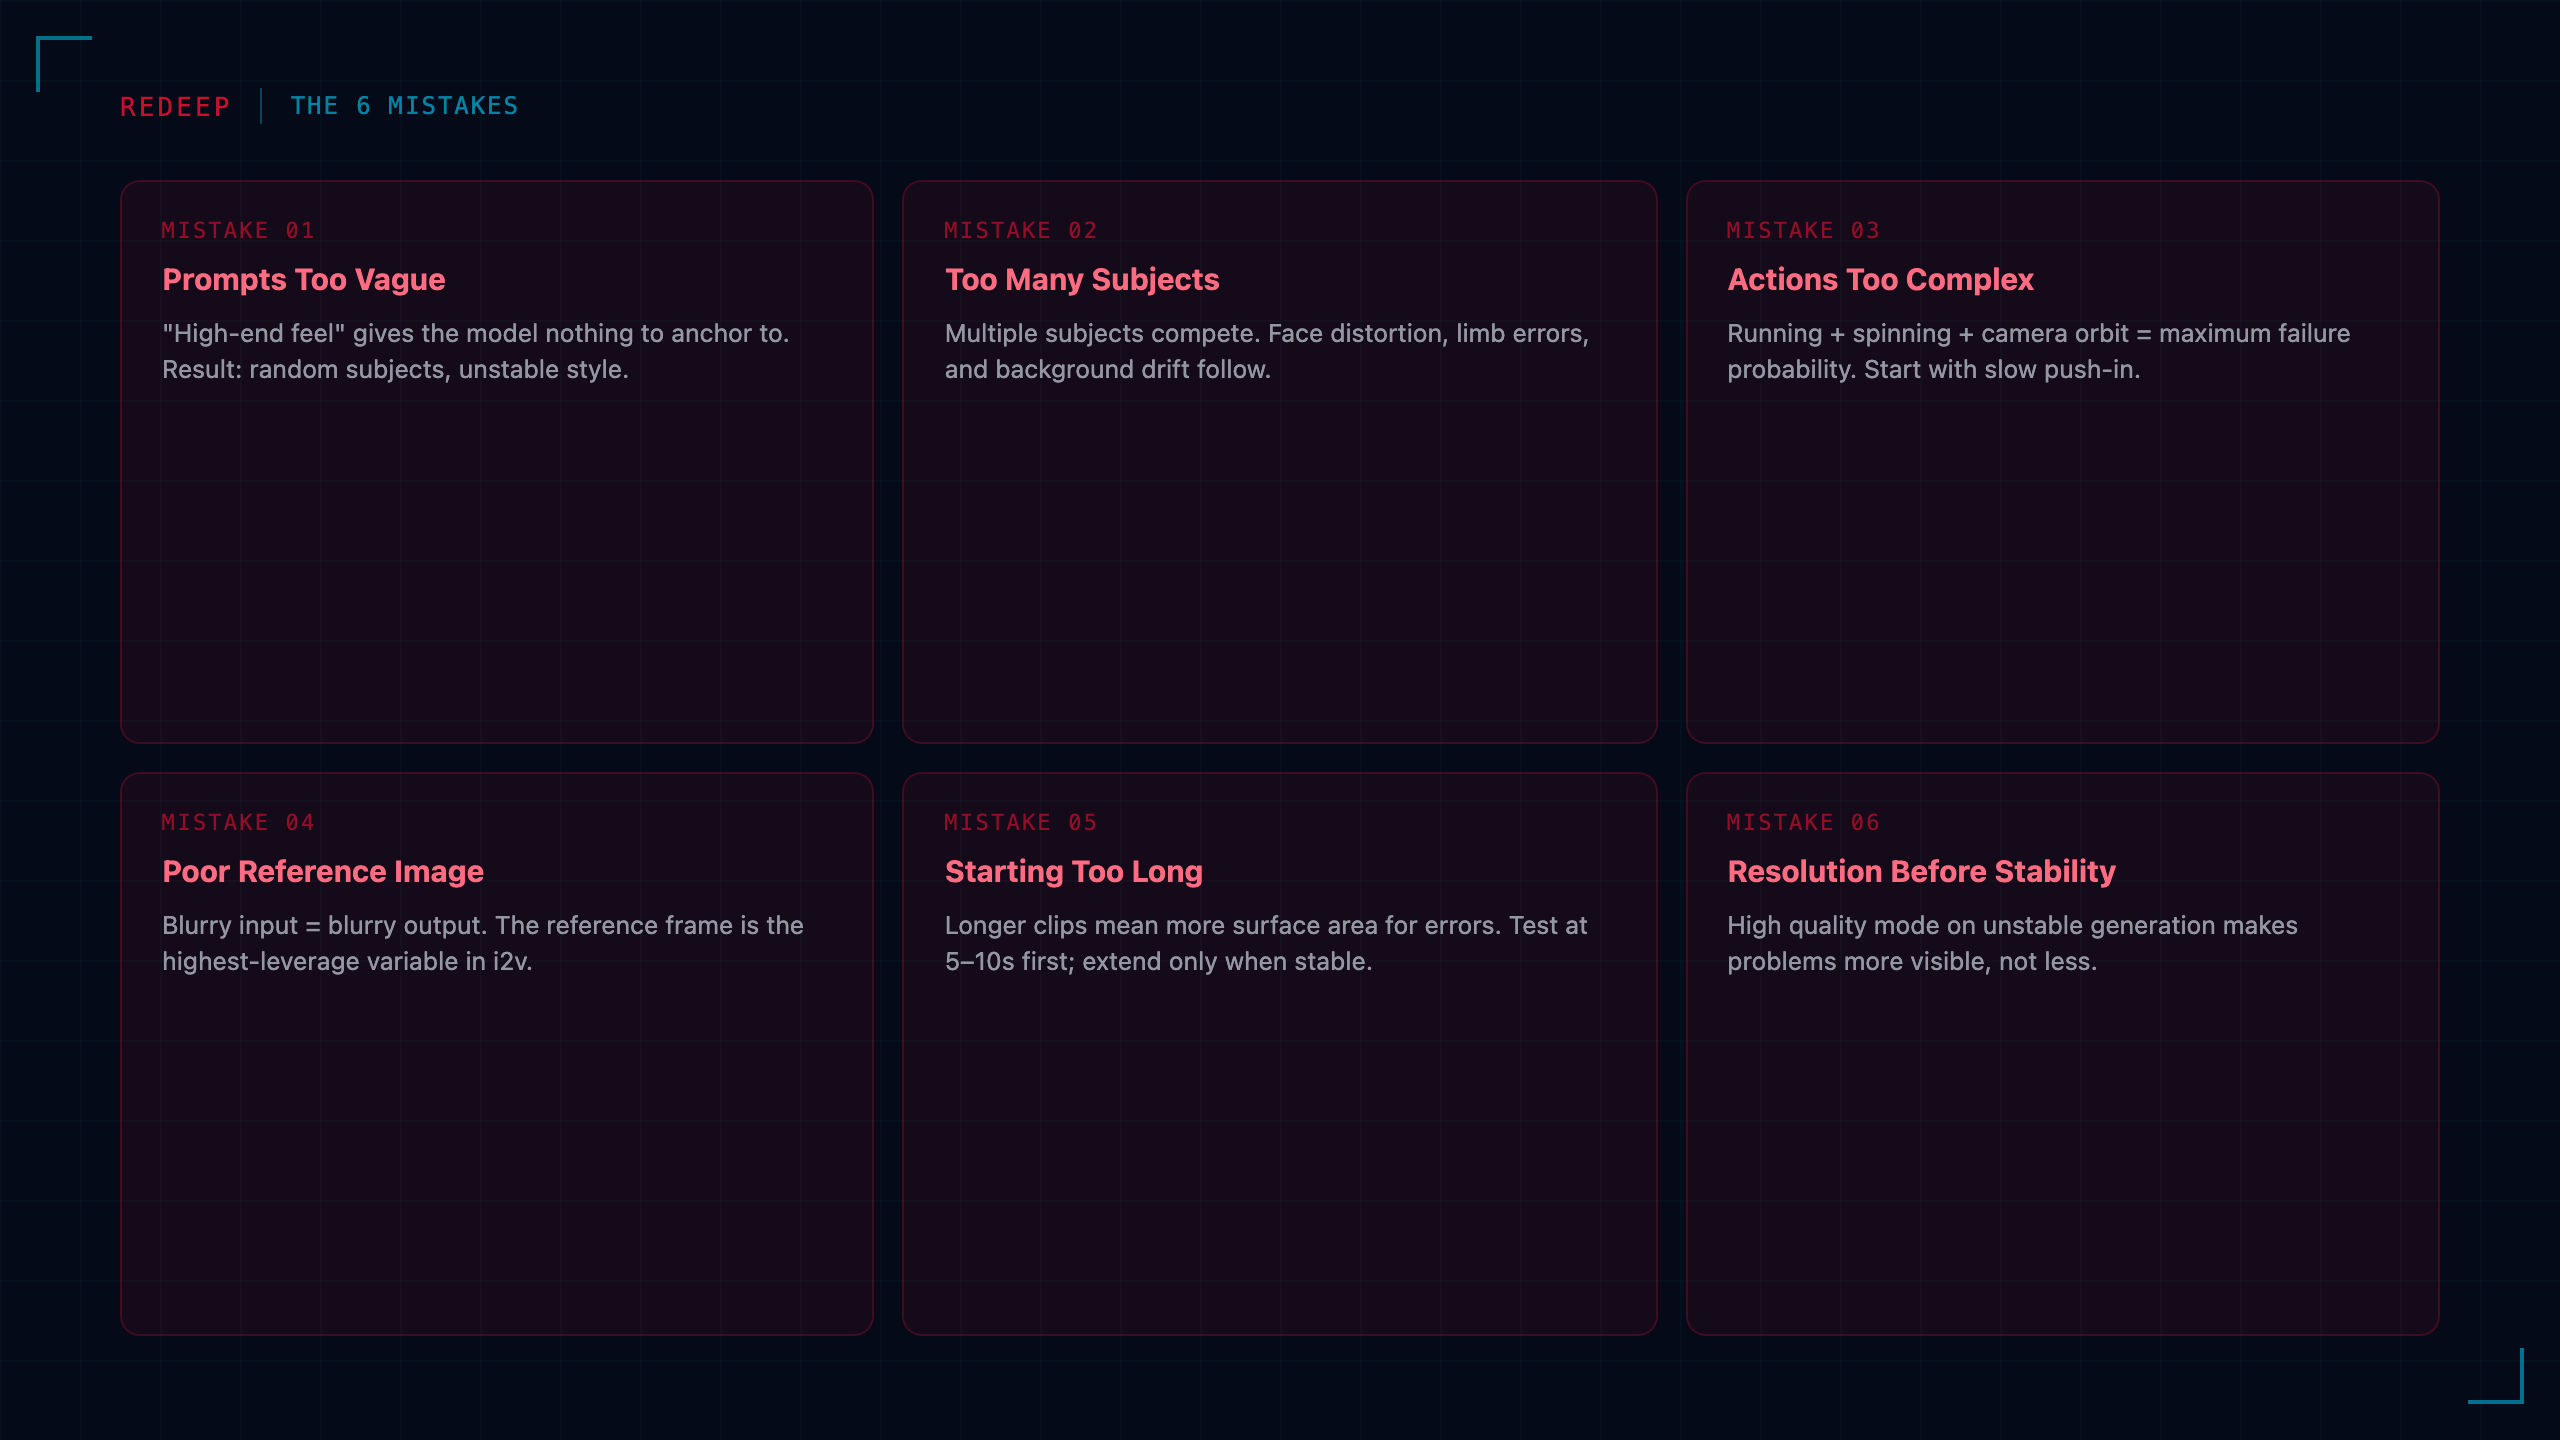
Most bad Kling outputs trace back to one or more of these six root causes.
Mistake 1: Prompts too vague. Writing "create a high-end feel" gives the model nothing to anchor to. The result is random subject choices, inconsistent style, and unstable motion. A working prompt specifies: subject, scene, action, camera move, style, lighting, aspect ratio, duration, and a constraints block ("no extra characters, no text distortion, subject stays stable").
Mistake 2: Too many subjects in frame. Packing a person, a product, a cityscape, and a moving vehicle into one clip isn't cinematic — it's a recipe for face distortion, drifting backgrounds, and limb errors. Start with one core subject. Once that's stable, layer in secondary elements.
Mistake 3: Actions too complex. Running, jumping, spinning, waving, fast camera orbits, and scene transitions all in one clip maximizes failure probability. What actually works for beginners: slow push-in, subject gently rotating, person looking naturally toward camera, product floating into frame. Save complex motion for after you've nailed the basics.
Mistake 4: Poor reference image quality. Image-to-video quality is almost entirely determined by the reference frame. Blurry input, occluded subject edges, overexposed backgrounds, incomplete subject framing — all of these transfer directly to the output. Before touching model settings, swap the reference image. A cleaner input image fixes more problems than any parameter tweak.
Mistake 5: Starting too long. Longer clips mean more temporal surface area for the model to get something wrong. Subject drift, style shift, and motion artifacts compound over time. Test at 5–10 seconds first. If the core behavior is stable, extend — or better yet, shoot separate clips and stitch in post.
Mistake 6: Optimizing for resolution before stability. High quality mode on an unstable generation makes problems more visible, not less. Sharpening a distorted face doesn't fix the face. Get the motion, composition, and subject consistency right at a lower quality setting first, then push the resolution.
What Actually Drives Clarity and Stability
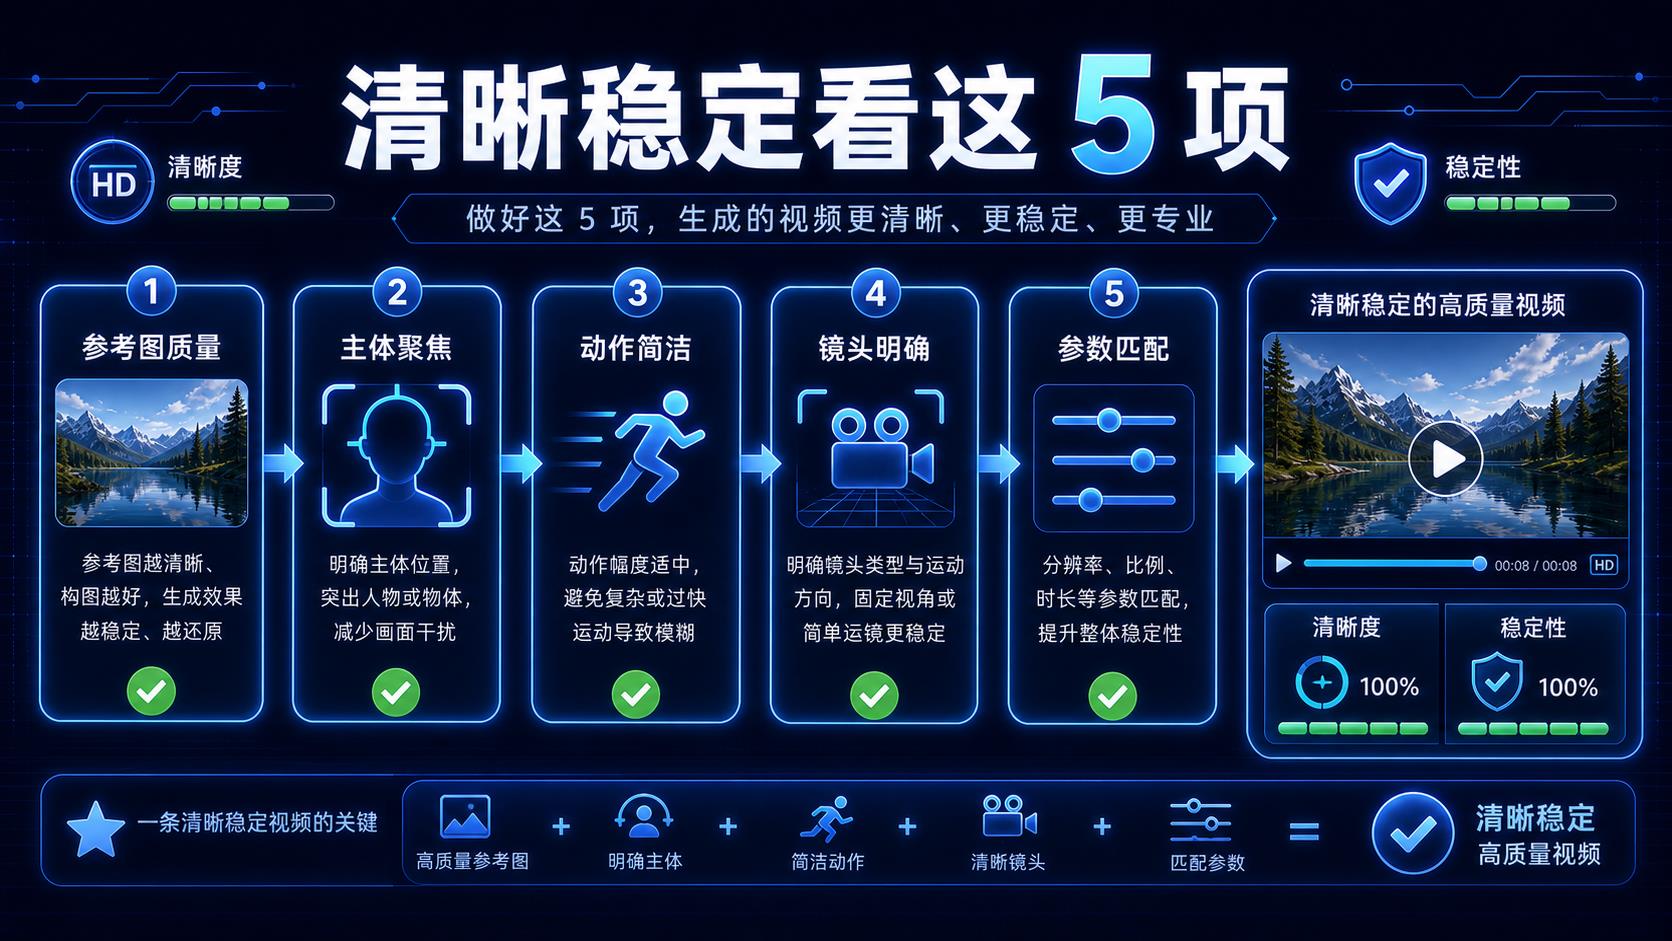
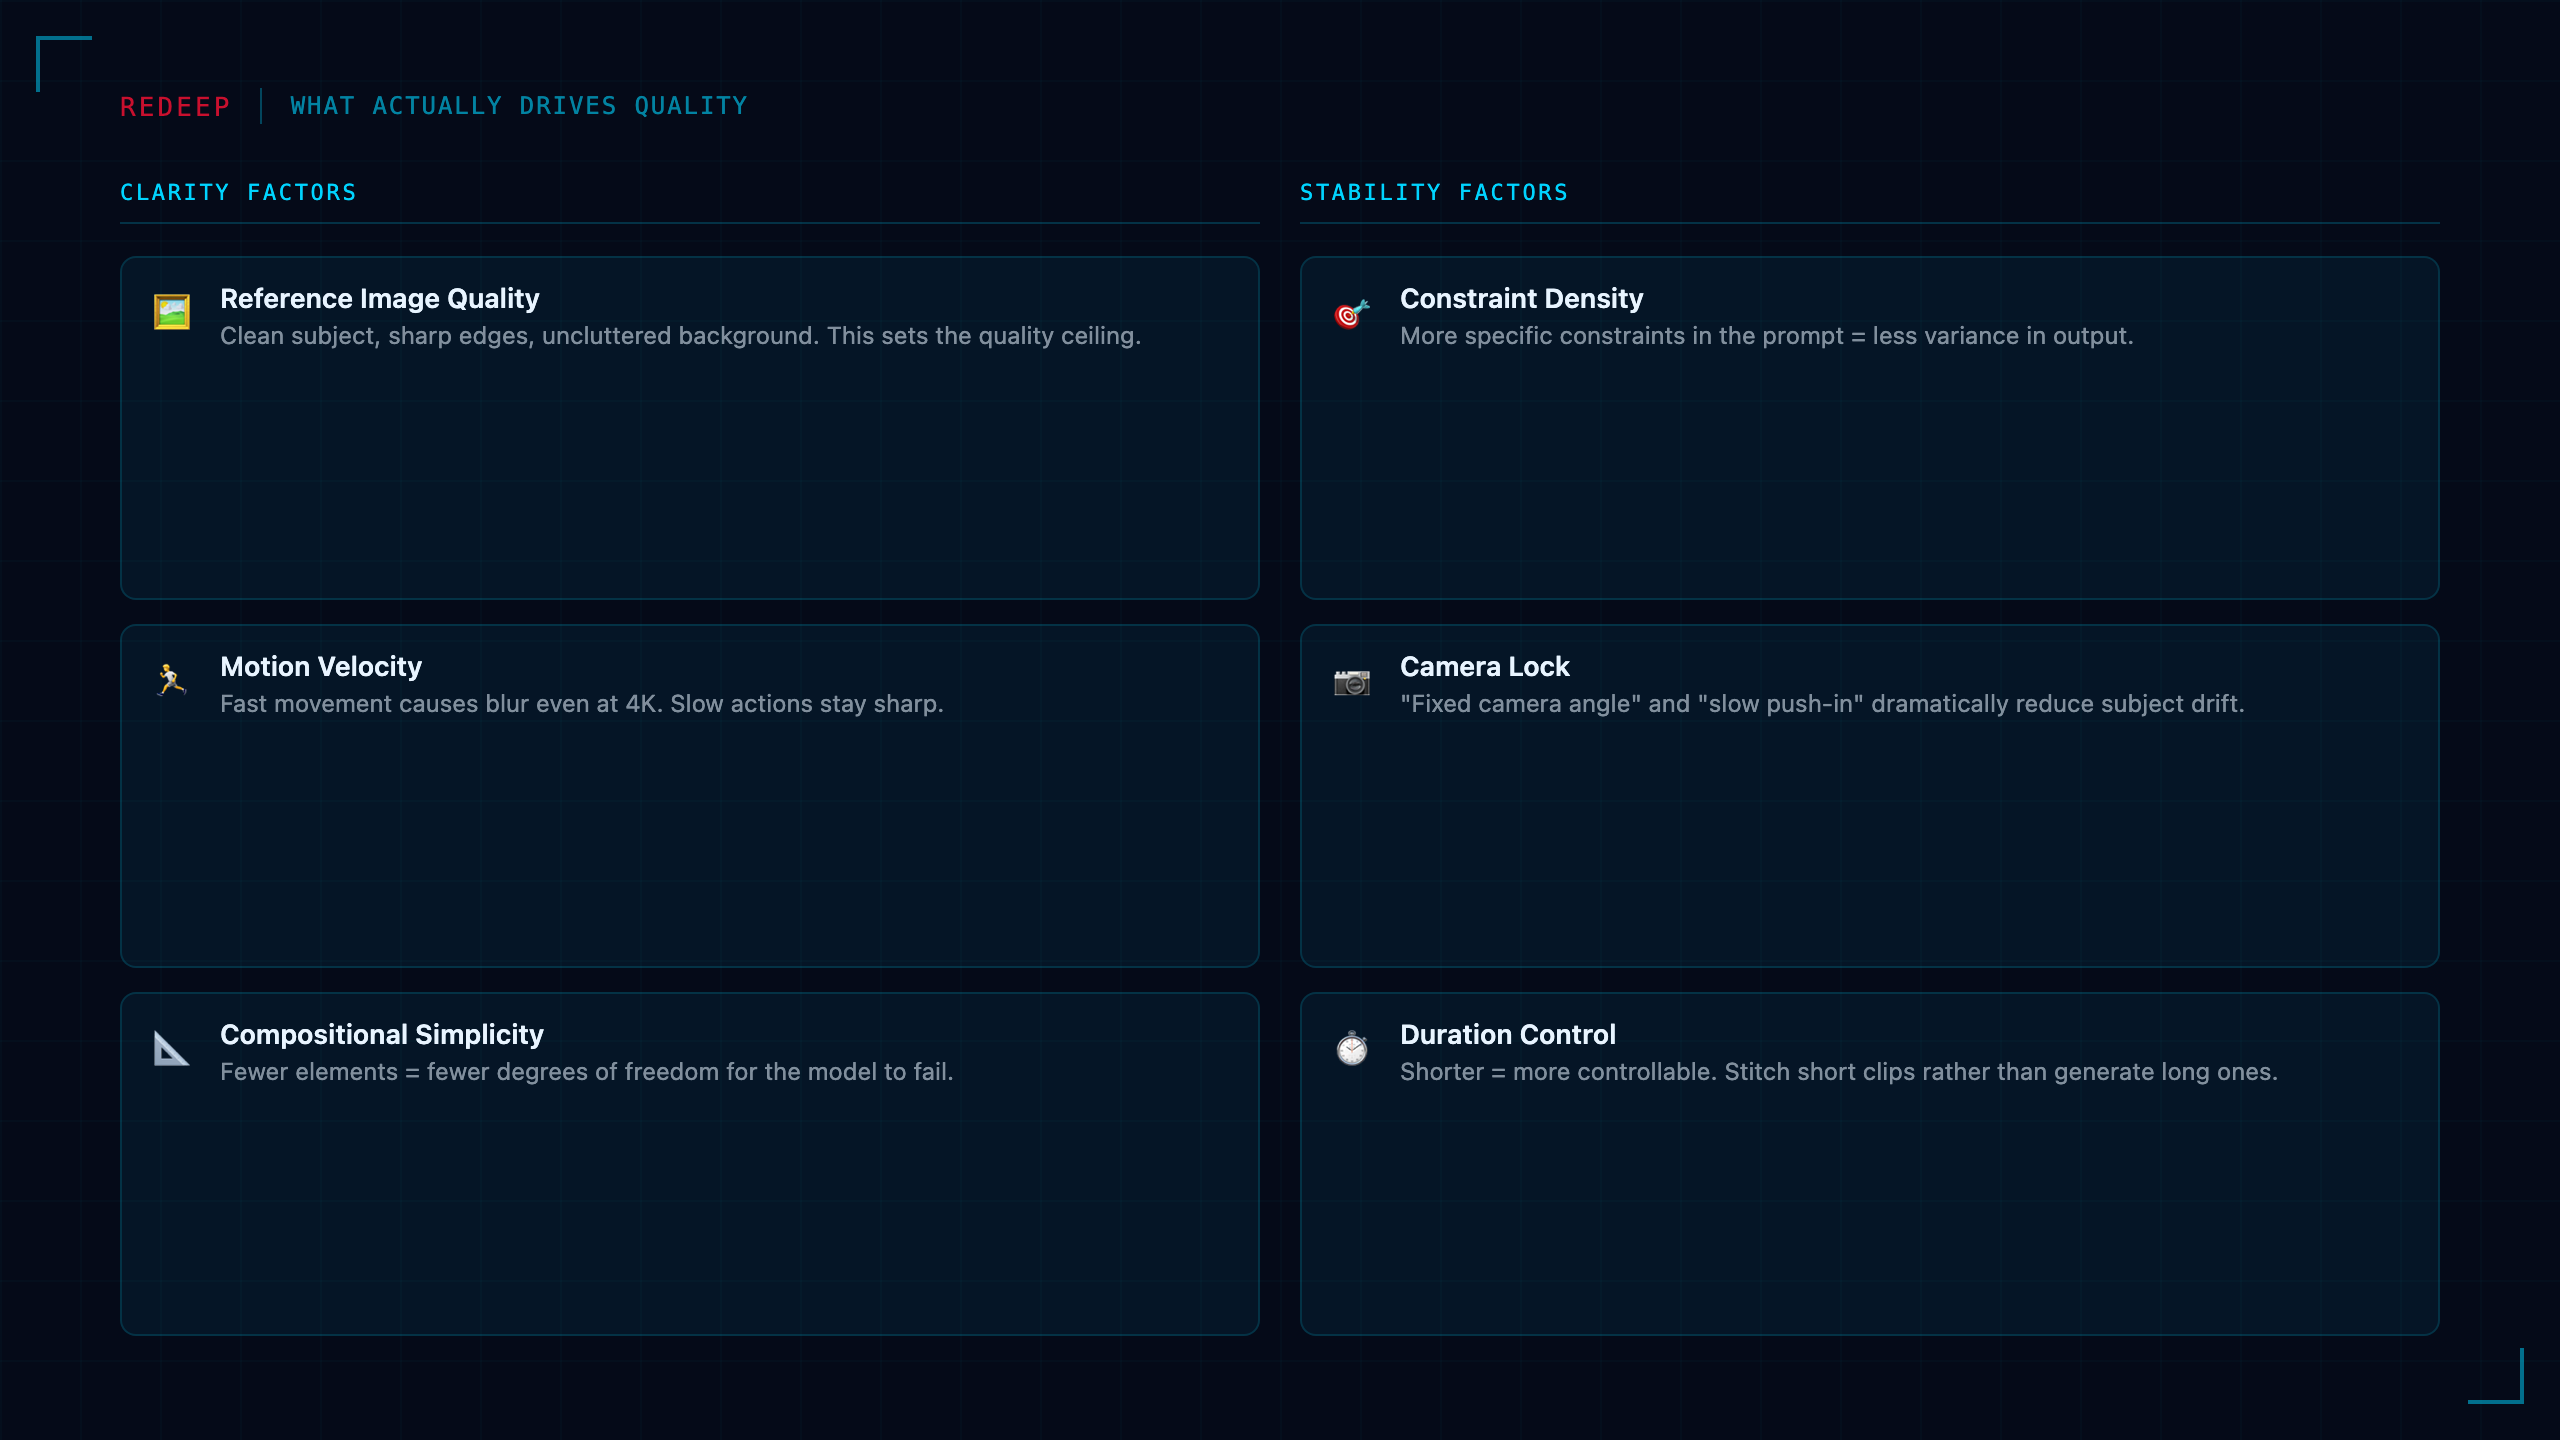
Resolution is just one component of "clarity." The others are: subject edge definition (affected by reference image quality and scene complexity), motion velocity (fast movement = blur even at 4K), camera shake (more stabilized camera descriptions → better output), lighting consistency, and compositional simplicity.
Stability — meaning the subject doesn't morph, drift, or accumulate errors across frames — comes from constraint. More constraints in the prompt and a simpler visual scene give the model fewer degrees of freedom to fail. The best Kling outputs aren't achieved by asking for more; they're achieved by systematically eliminating sources of variance.
One more thing the top creators don't mention: the clips you see shared publicly are usually not first-generation outputs. They're the result of multiple prompt iterations, reference image swaps, and version comparison. The workflow matters as much as the prompt.
The 6-Step Optimization Flow
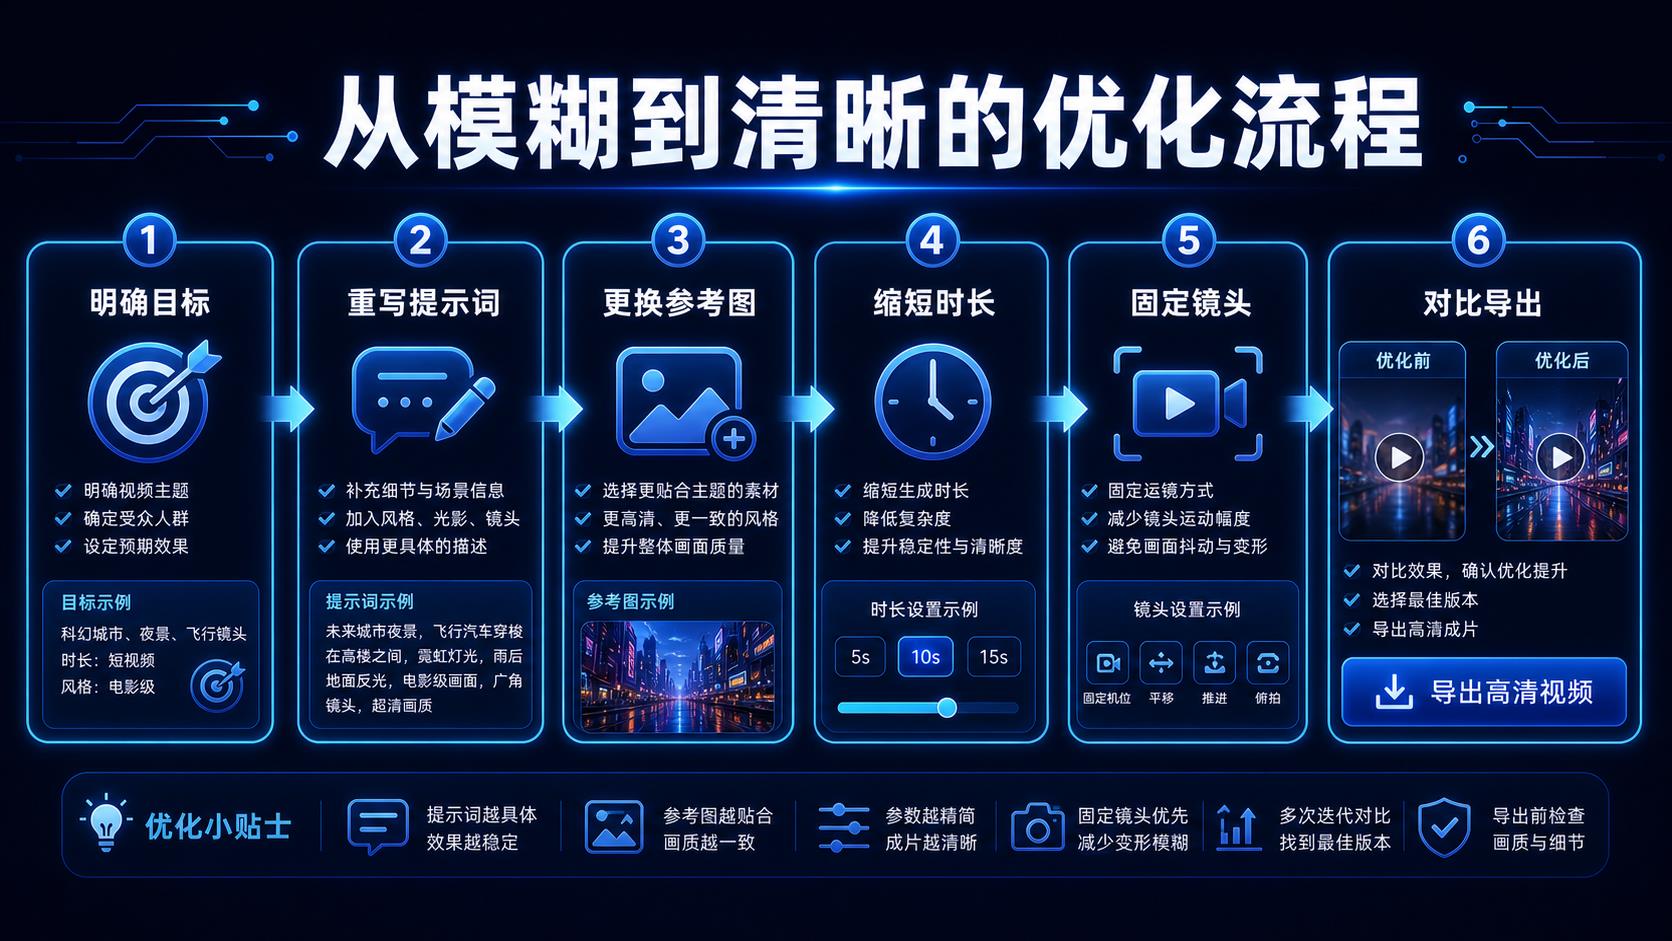
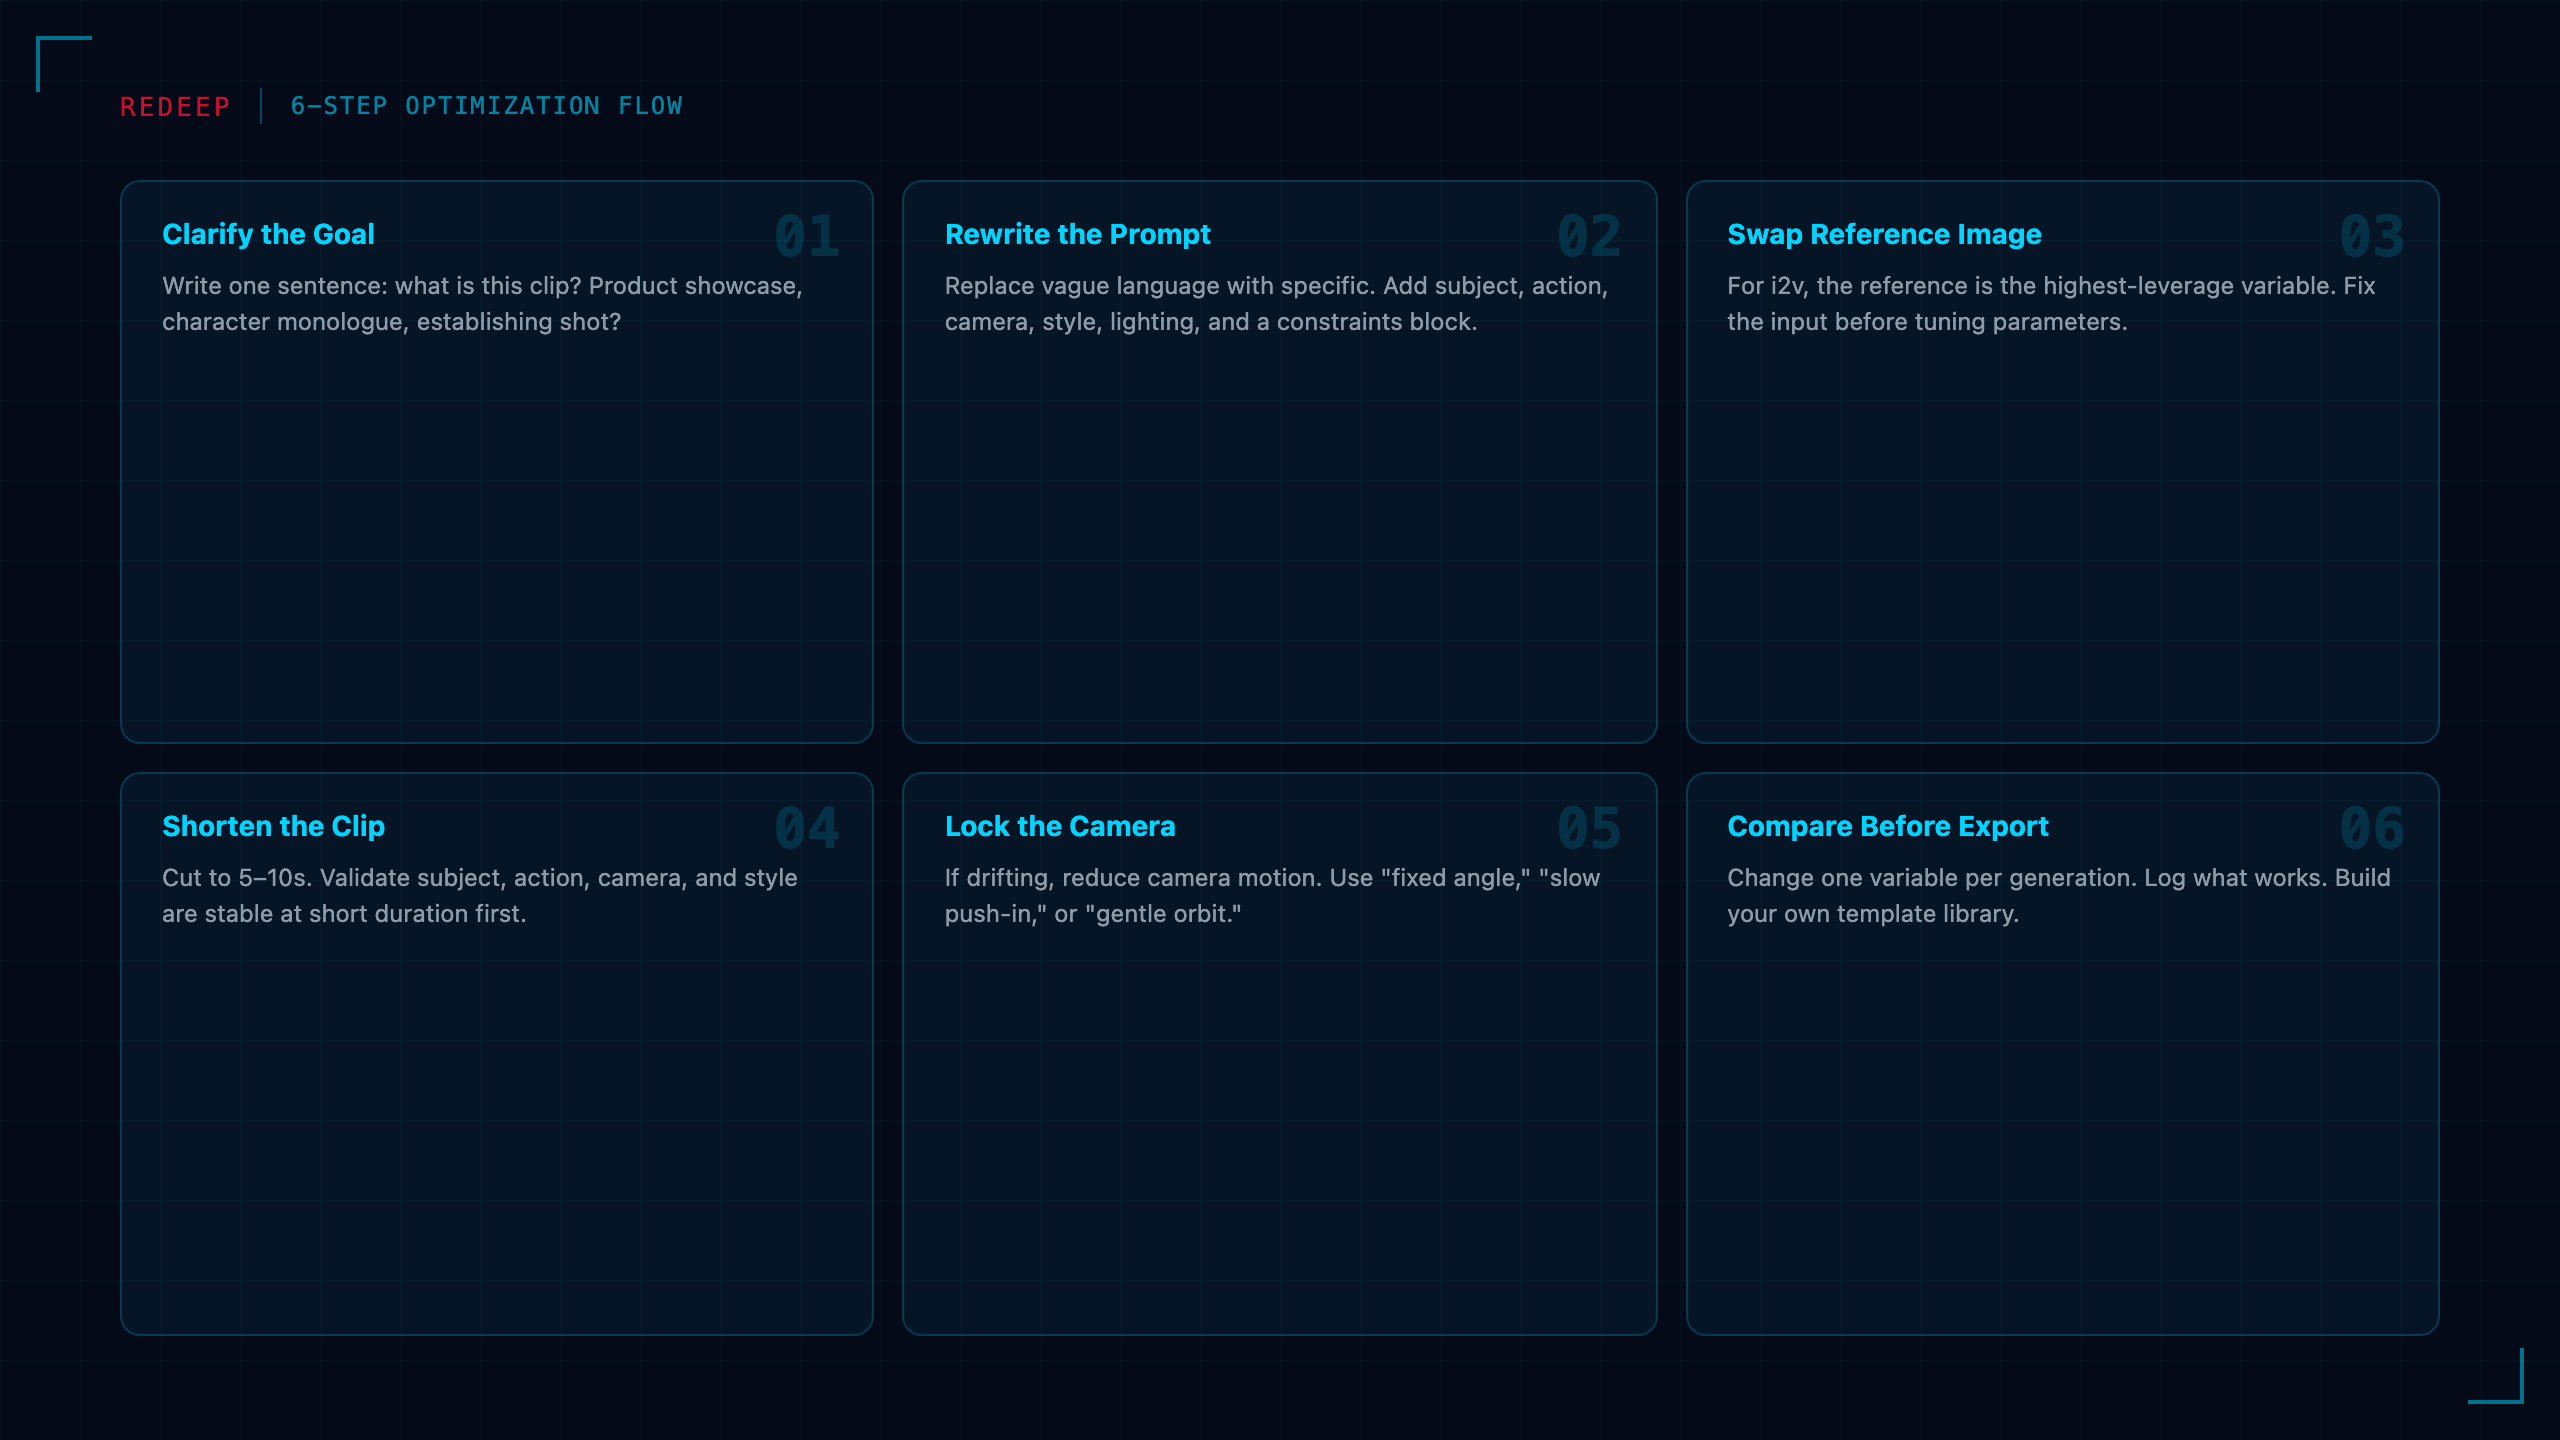
When output quality is failing, work through this sequence rather than randomly tweaking parameters:
Step 1 — Clarify the goal. Write one sentence: what is this clip supposed to be? Product showcase, character monologue, establishing shot, narrative beat? Undefined goal = undefined output.
Step 2 — Rewrite the prompt. Replace vague language with specific language. Cut conflicting instructions. Add a constraints block at the end. The goal isn't a longer prompt — it's a more precise one.
Step 3 — Swap the reference image. If using image-to-video, the reference image is the highest-leverage variable. Before touching anything else, ask: is this image sharp, well-lit, with the subject fully in frame and a clean background?
Step 4 — Shorten the clip. Cut target duration to 5–10 seconds. Validate that subject, action, camera, and style are all working. Only extend once the short version is stable.
Step 5 — Lock the camera. If the subject is drifting or the frame is jittery, reduce camera motion. Phrases like "fixed camera angle," "slow push-in," and "gentle orbit" all produce more stable results than "dynamic camera movement."
Step 6 — Compare before exporting. Change one variable per generation. Keep the best version as your baseline. Log which prompt phrasing, reference image, and parameter set produced it. Build your own template library from what actually works.
Prompt Templates You Can Use Right Now
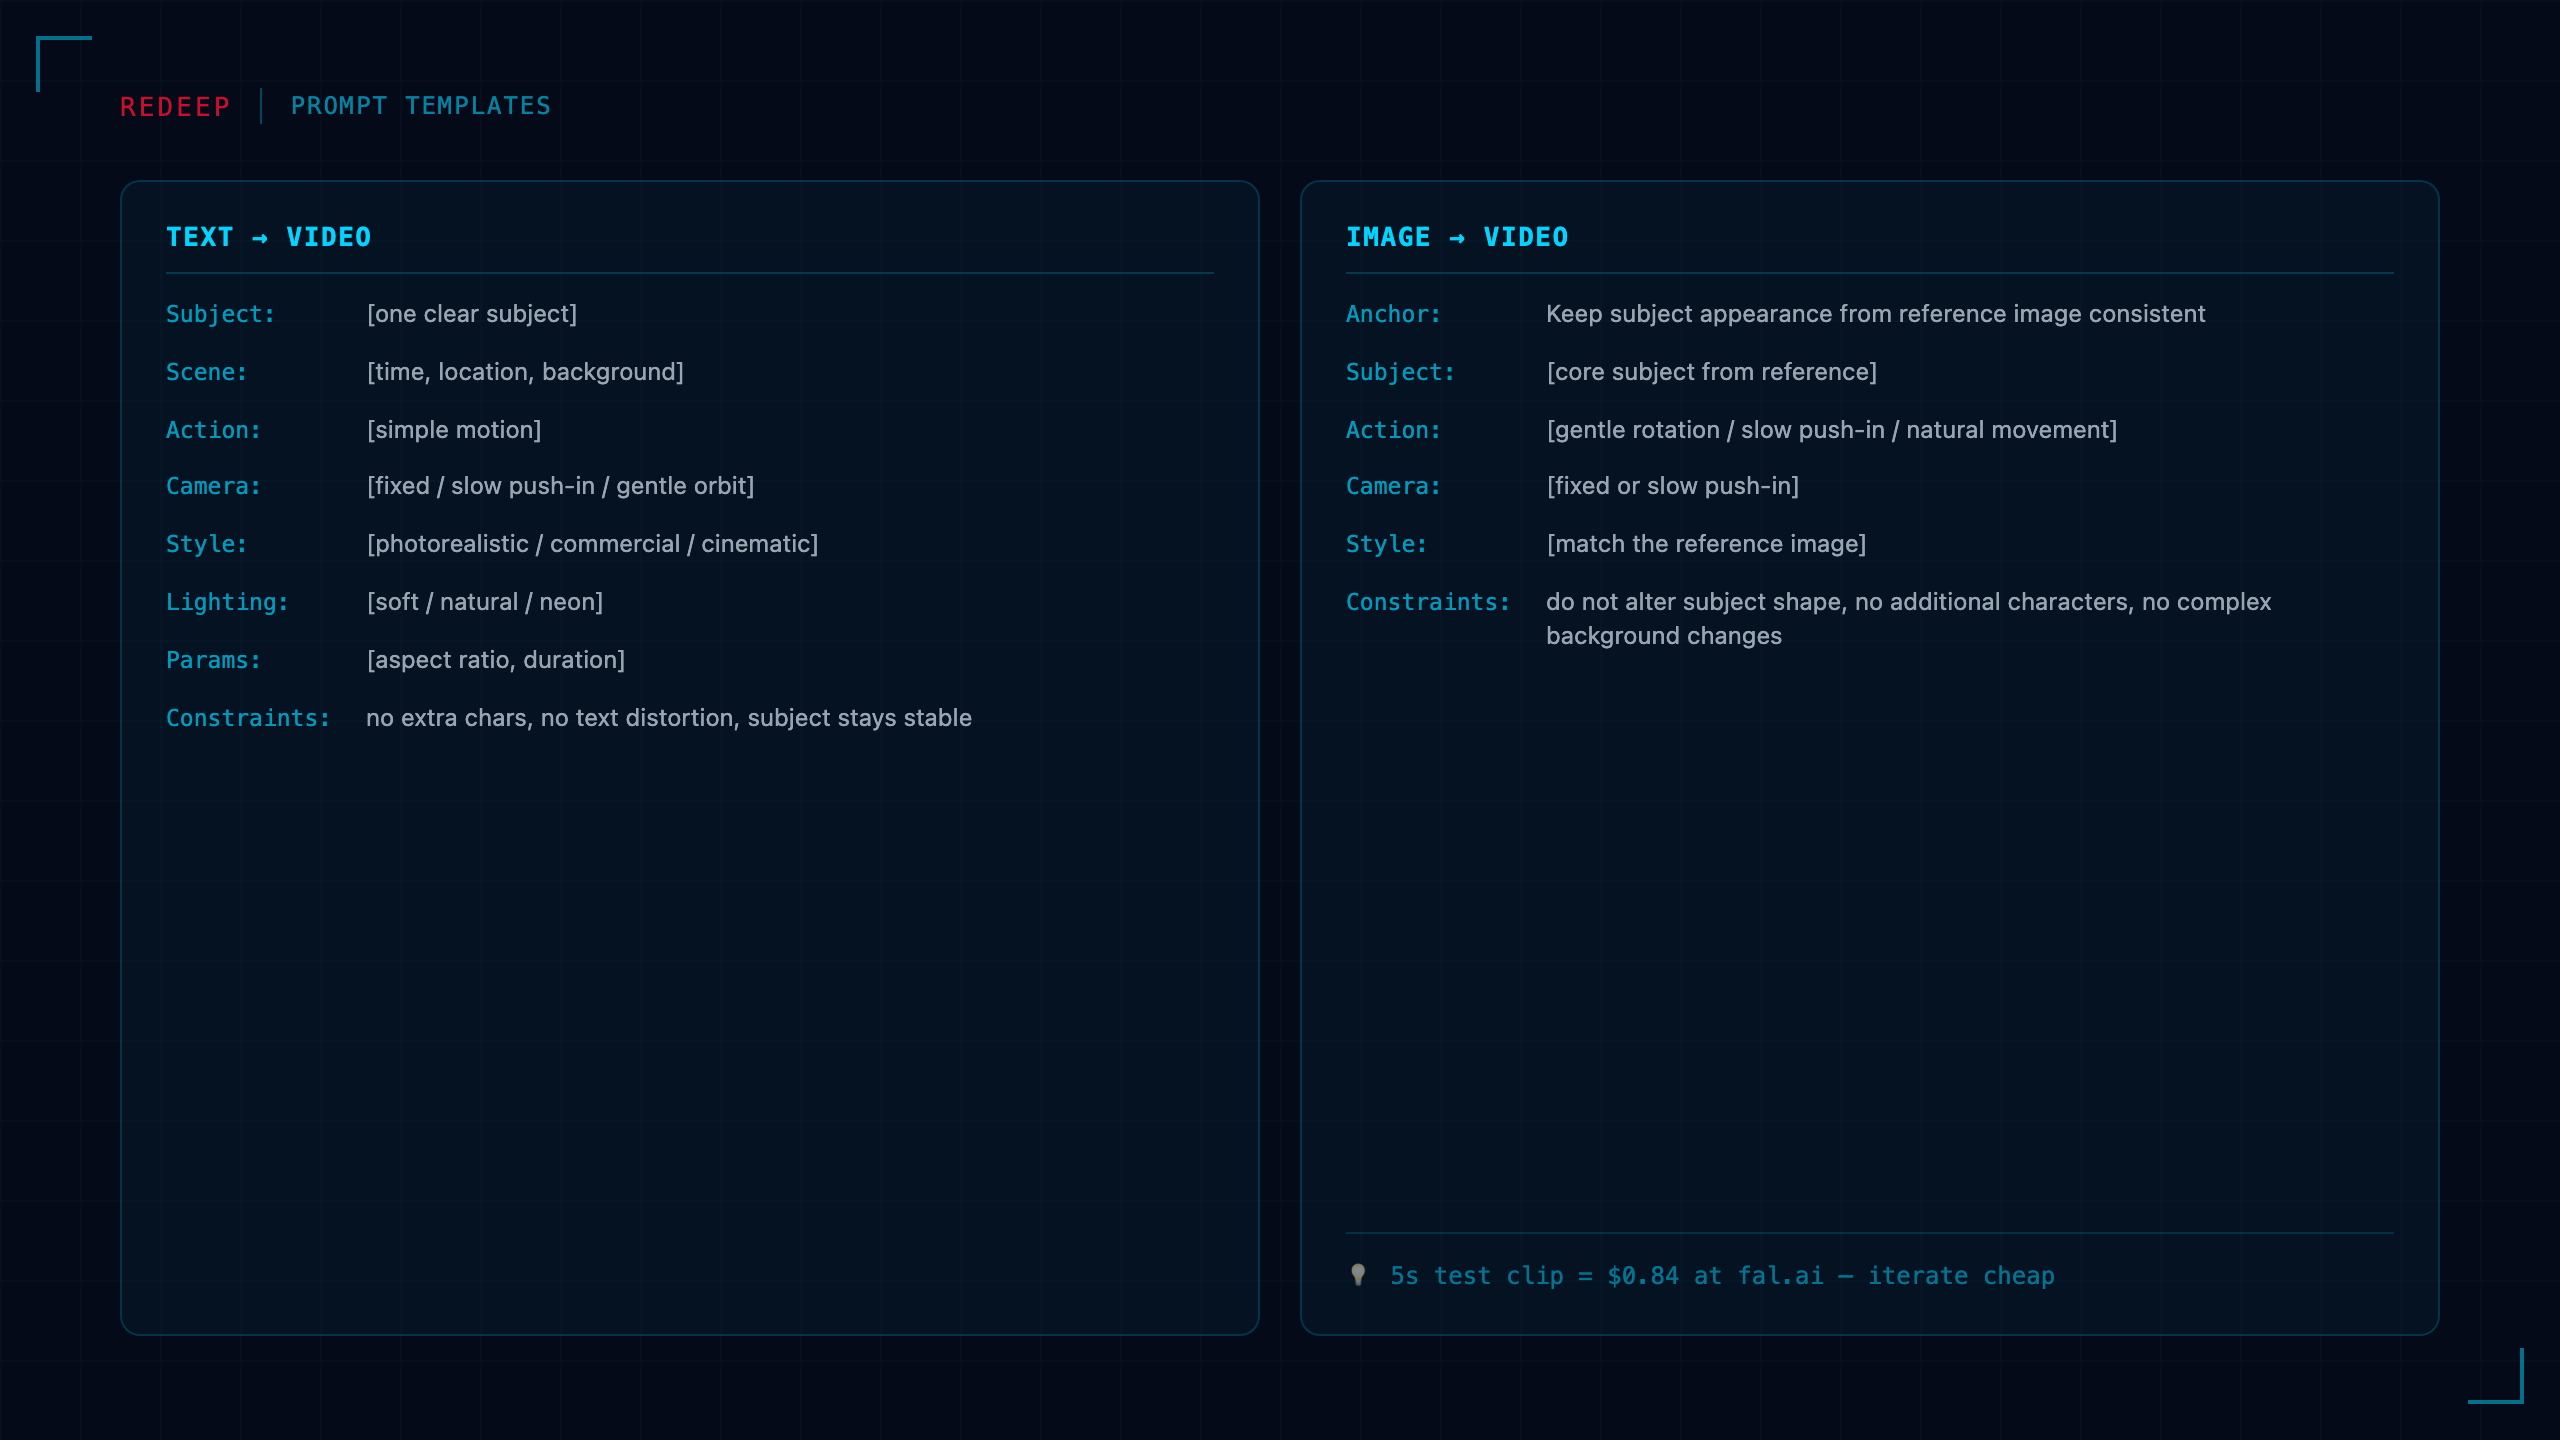
Stop writing from scratch. These two templates cover the majority of use cases.
Text-to-video template:
Subject: [one clear subject]
Scene: [time, location, background]
Action: [simple motion]
Camera: [fixed / slow push-in / gentle orbit]
Style: [photorealistic / commercial / cinematic]
Lighting: [soft / natural / neon]
Parameters: [aspect ratio, duration]
Constraints: [no extra characters, no text distortion, no watermark, subject stays stable]
Image-to-video template:
Based on the uploaded reference image, generate video keeping subject appearance consistent.
Subject: [core subject from reference image]
Action: [gentle rotation / slow push-in / natural movement]
Camera: [fixed or slow push-in]
Style: [match the reference image]
Constraints: [do not alter subject shape, no additional characters, no complex background changes]
Concrete example for a product shot: "A silver wireless headset sitting on a deep-blue tech-themed desk surface. Camera slowly pushes in. Soft blue edge lighting on the headset. Clean background. Commercial advertising aesthetic. Photorealistic quality. 16:9, 5 seconds. No characters, no text overlays, subject stays stable." That level of specificity is the difference between "generate something high-end" and actually getting it.
What It Means for Developers
If you're accessing Kling via fal.ai at $0.168/sec or direct via the Kling API, these patterns directly affect credit burn rate. A disciplined test-at-5-seconds-first policy cuts wasted compute by roughly half when iterating on a new subject or style. The prompt structure above also maps cleanly to API parameter fields — you can template it once and parameterize the per-generation variables programmatically.
For image-to-video workflows especially: treating reference image quality as a preprocessing step (not an afterthought) pays dividends. Run your reference images through an upscaler or background remover before feeding them to Kling. The input frame quality floor is the output quality ceiling.
Bottom Line
Kling's failure modes are learnable patterns, not random noise. Vague prompts, crowded frames, complex motion, weak reference images, long clips, and premature resolution chasing all predictably degrade output. The fix is systematic: one subject, precise constraints, short test clips, stable camera, quality reference images — in that order. High resolution comes last, not first.
Resources
- Kling AI Official Site — web interface and API access
- Kling via fal.ai — API pricing at $0.168/sec
- Kling API Docs — official developer documentation
Kling AI is available via the web at klingai.com and via API through fal.ai. At $0.168/sec, a 5-second test clip costs $0.84 — keep your iteration loops short until the baseline is solid.